Day52: Your CI/CD pipeline on AWS - Part 3 🚀 ☁

Hey there! I am Sayali!! I started writing articles on my DevOps and cloud journey👩🏻💻. My purpose is to share the concepts that I learn, the projects that I build, and the tasks that I perform regarding DevOps. Welcome to my blog!!
What is CodeDeploy?
AWS CodeDeploy is a deployment service that automates application deployments to Amazon EC2 instances, on-premises instances, serverless Lambda functions, or Amazon ECS services.
CodeDeploy can deploy application content that runs on a server and is stored in Amazon S3 buckets, GitHub repositories, or Bitbucket repositories. CodeDeploy can also deploy a serverless Lambda function. You do not need to make changes to your existing code before you can use CodeDeploy.
Task-01 :
Read about Appspec.yaml file for CodeDeploy.
The application specification file (AppSpec file) is a YAML -formatted or JSON-formatted file used by CodeDeploy to manage deployment. The AppSpec file for an EC2/On-Premises deployment must be named appspec. yml or appspec.yaml, unless you are performing a local deployment.
The appspec.yaml file is a configuration file that defines how the deployment should proceed. It specifies the deployment process, including which files should be deployed, where they should be deployed, and any scripts or hooks that should be executed during the deployment.
The appspec.yaml file typically includes the following sections:
version: This section specifies the version of the AppSpec file format being used.
os: This section specifies the operating system of the target instances.
files: This section specifies the source and destination locations of the files to be deployed.
hooks: This section specifies any scripts or hooks that should be executed during the deployment, such as scripts to stop and start the application.
The AppSpec file must be located in the root directory of the application source code and must be named “appspec.yml” or “appspec.yaml”. When you create a deployment group in CodeDeploy, you can specify the location of the AppSpec file in the deployment configuration.
Deploy index.html file on EC2 machine using nginx
For code commit and code build steps, please follow my Day 51 task article.
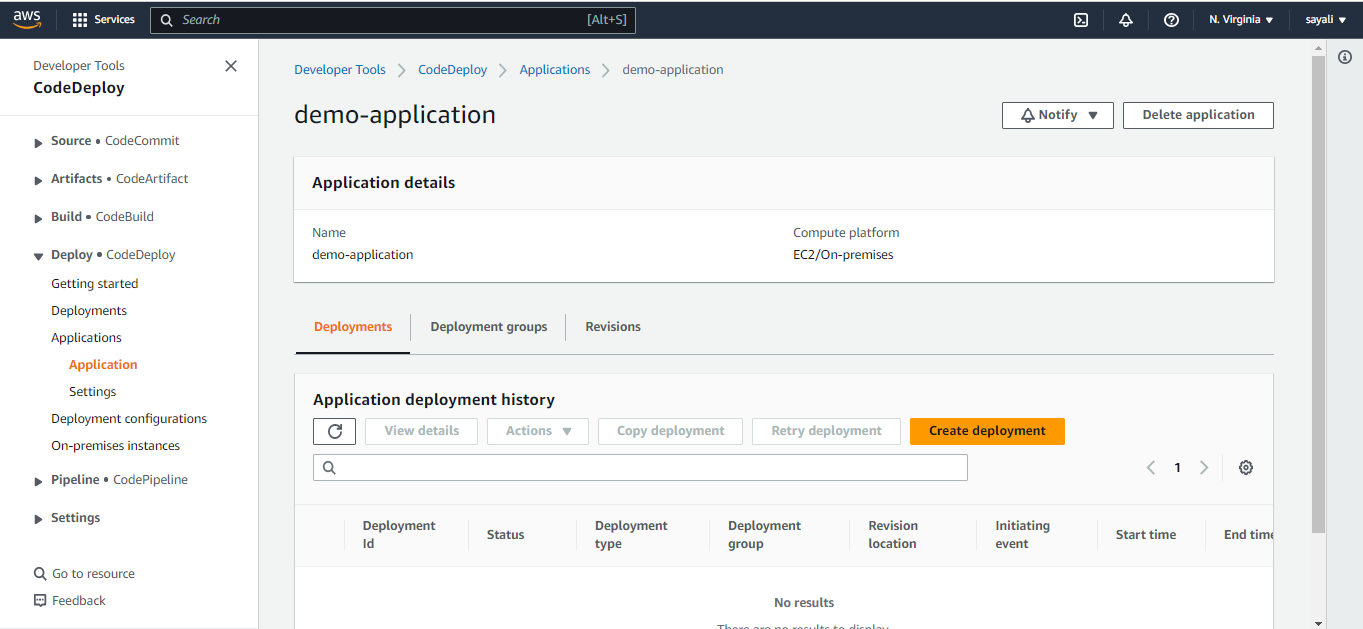
Create a CodeDeploy application:
You need to create a CodeDeploy application to deploy your index.html file. You can do this in the AWS Management Console.
In CodeDeploy, go to Applications and click on 'Create application'.

Select compute platform 'EC2/on premises' and click on 'Create application'.

Application is successfully created.

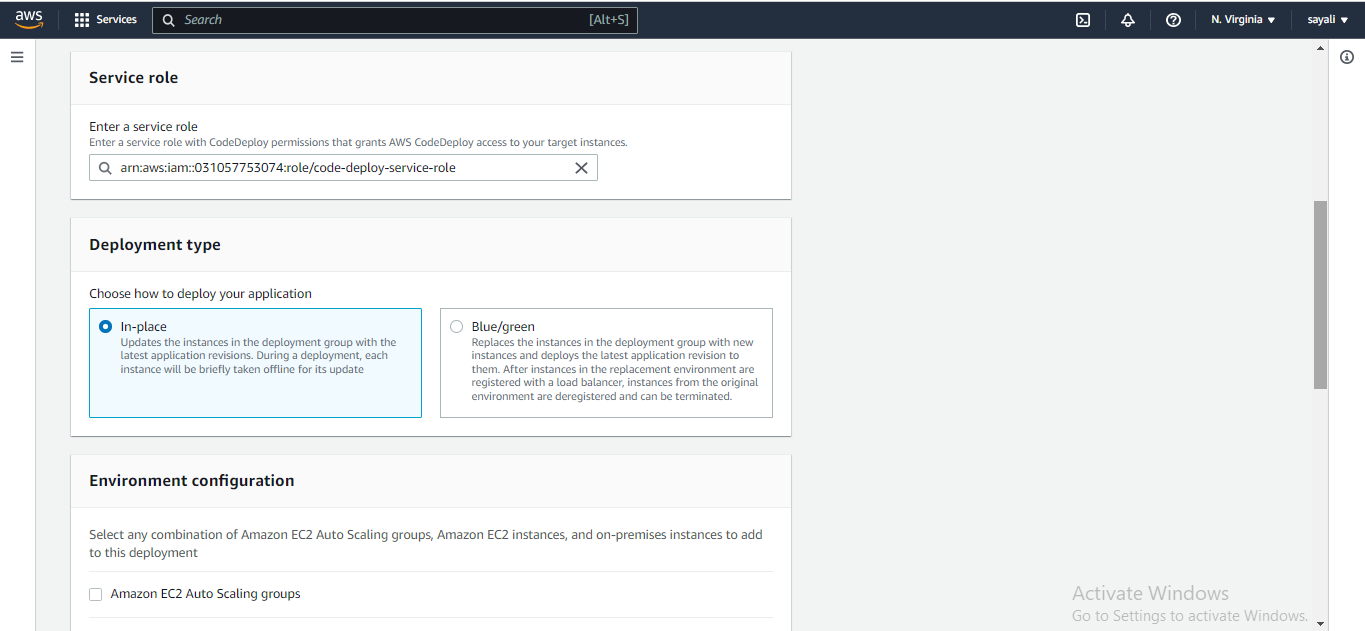
Create 'service role' for enabling communication between code deploy and other aws services.
Go to IAM service and create 'code-deploy-service-role' with below permissions.


Set up an EC2 instance:
You will need to create an EC2 instance on which you want to deploy the index.html file.
Create a ubuntu EC2 instance

Create a deployment group:
Once you have created a CodeDeploy application, you need to create a deployment group. A deployment group is a set of EC2 instances where you want to deploy your application.

Add deployment group name and choose 'Service role'.

Add instance name.


Click on 'Create deployment group'.

Deployment group is created.

You have to setup a CodeDeploy agent in order to deploy code on EC2.
Install the CodeDeploy agent:
You need to install the CodeDeploy agent on your Ubuntu EC2 instance. The CodeDeploy agent is a software package that runs on your instance and interacts with CodeDeploy to deploy your application. You can install the CodeDeploy agent by running the following script on your EC2 instance:
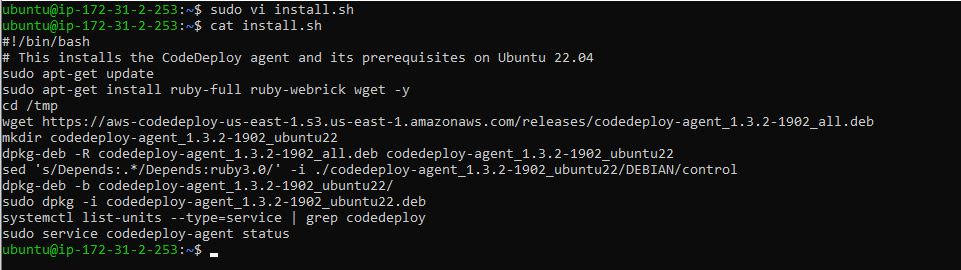
Run the script using the command bash install.sh

Code agent is running.

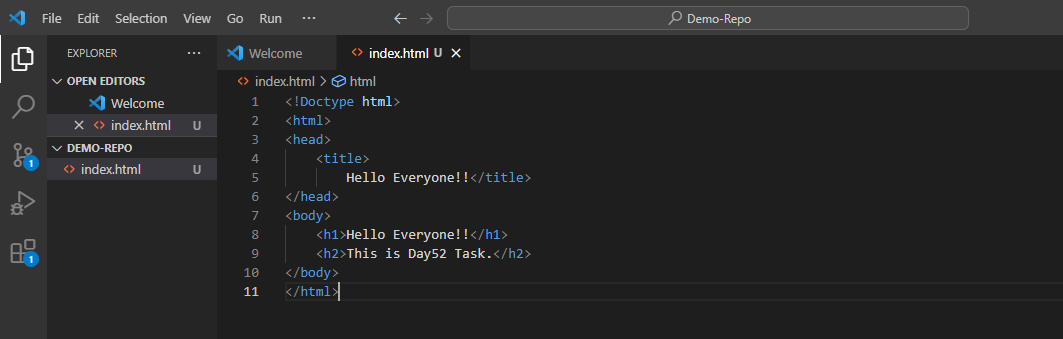
Create an index.html file:
you need to create an index.html file that you want to deploy. You can create a simple HTML file using any text editor.
Task-02 :
Add appspec.yaml file to CodeCommit Repository and complete the deployment process.
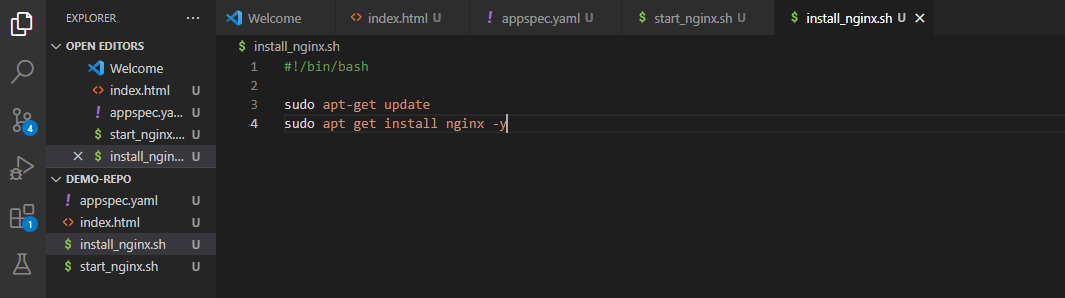
Create an appspec.yaml file:
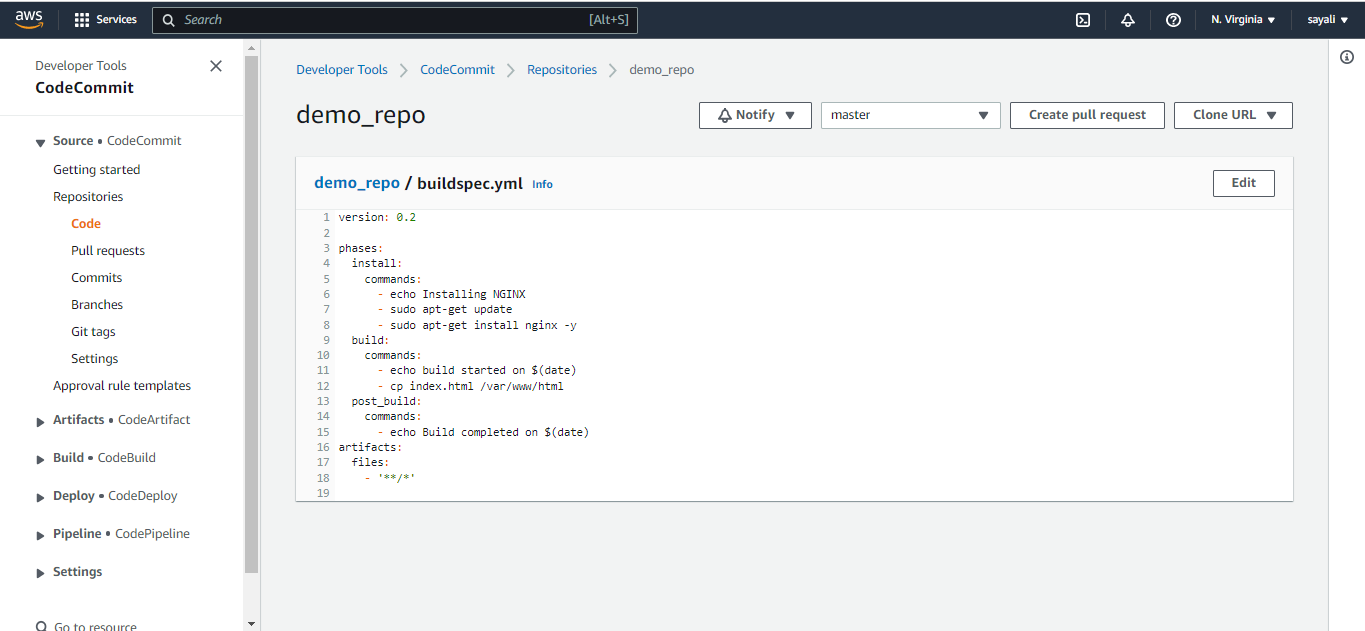
You need to create an appspec.yaml file that tells CodeDeploy what to do with your application. Here is an appspec.yaml file that deploys the index.html file on nginx. also create 2 scripts for installing nginx and starting nginx.


Push all the files to code commit using 'git add' and 'git commit' commands.

All the files updated in code commit.

Add changes to buildspec.yml file
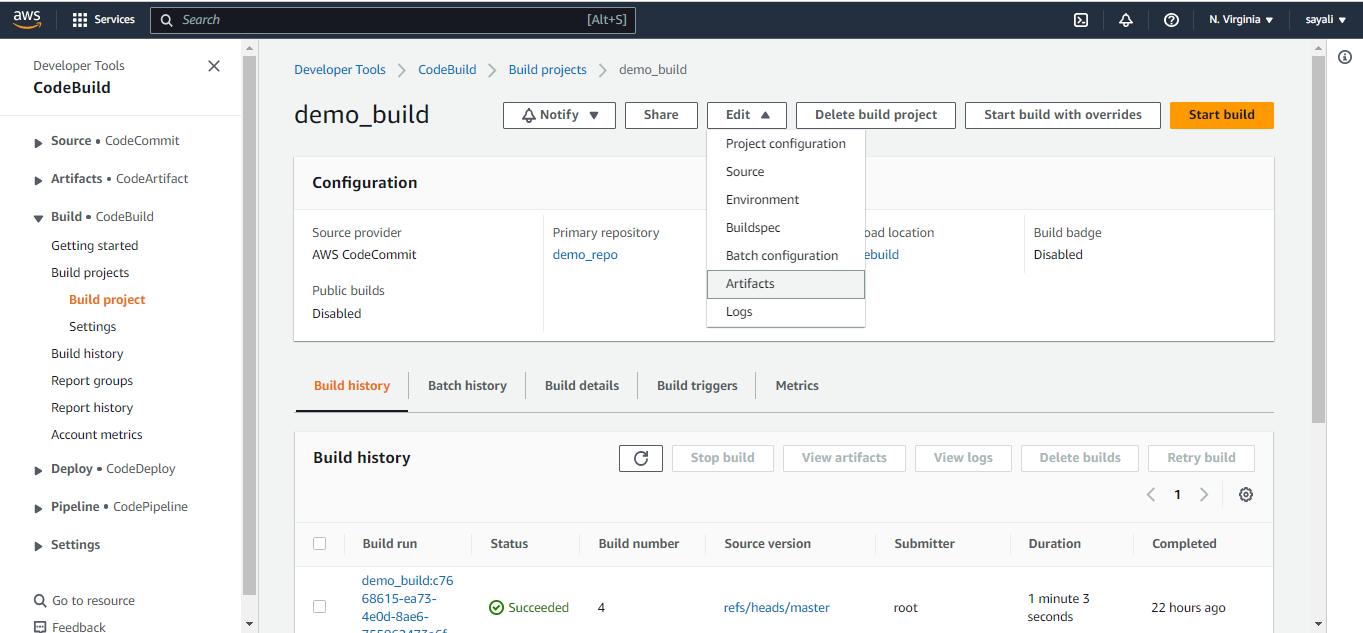
In build projects, Edit and choose 'Artifacts'.
first create 'S3 bucket'.

In Artifacts, select artifact type as Amazon S3 and choose bucket name.

Click on 'Update artifacts'.

Artifact upload location successfully added. Click on 'Start build'.

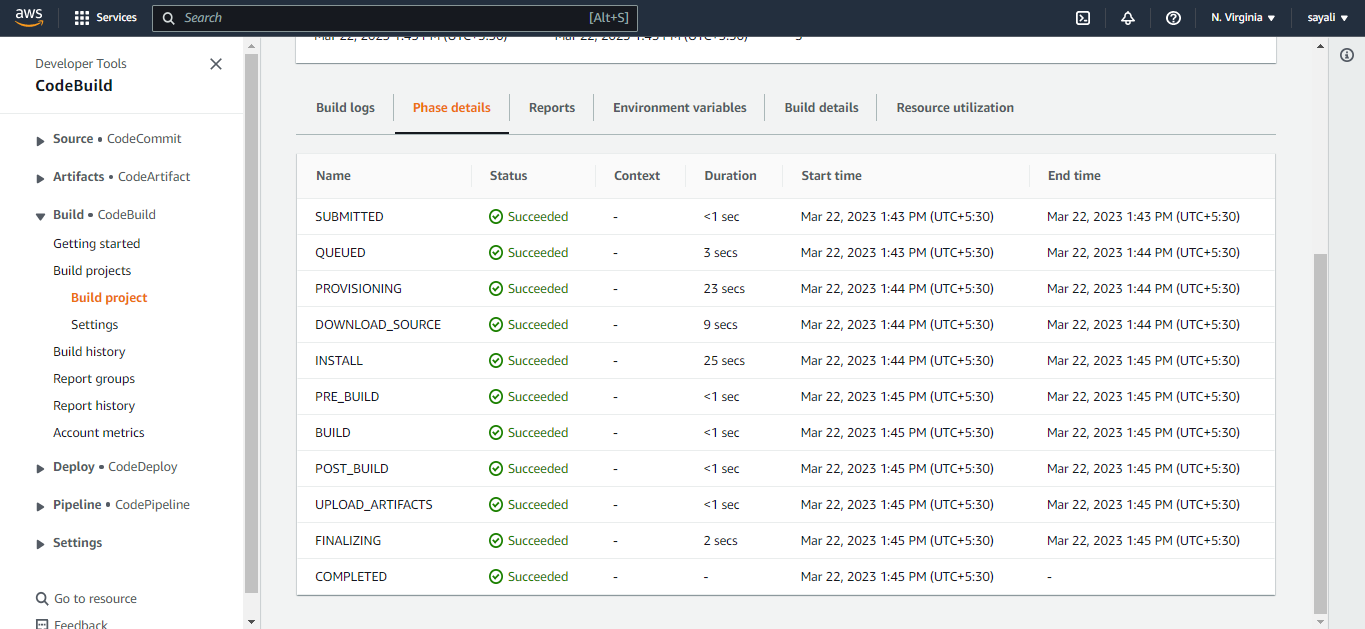
Build is Succeeded.
After build completion, go to S3 bucket and copy S3 url of nginx_code_output zip file.

Create deployment:
In Application, Go to Deployments and click on 'Create deployment'
In revision type, select amazon S3 and paste above copied S3 url to revision location.

Click on 'Create deployment'.

Deployment is created. but events are in pending state.

EC2 doesn't have any role policy to retrieve the data from S3 to CodeDeploy.
So create a new service role for enabling communication between EC2 and S3, code deploy.
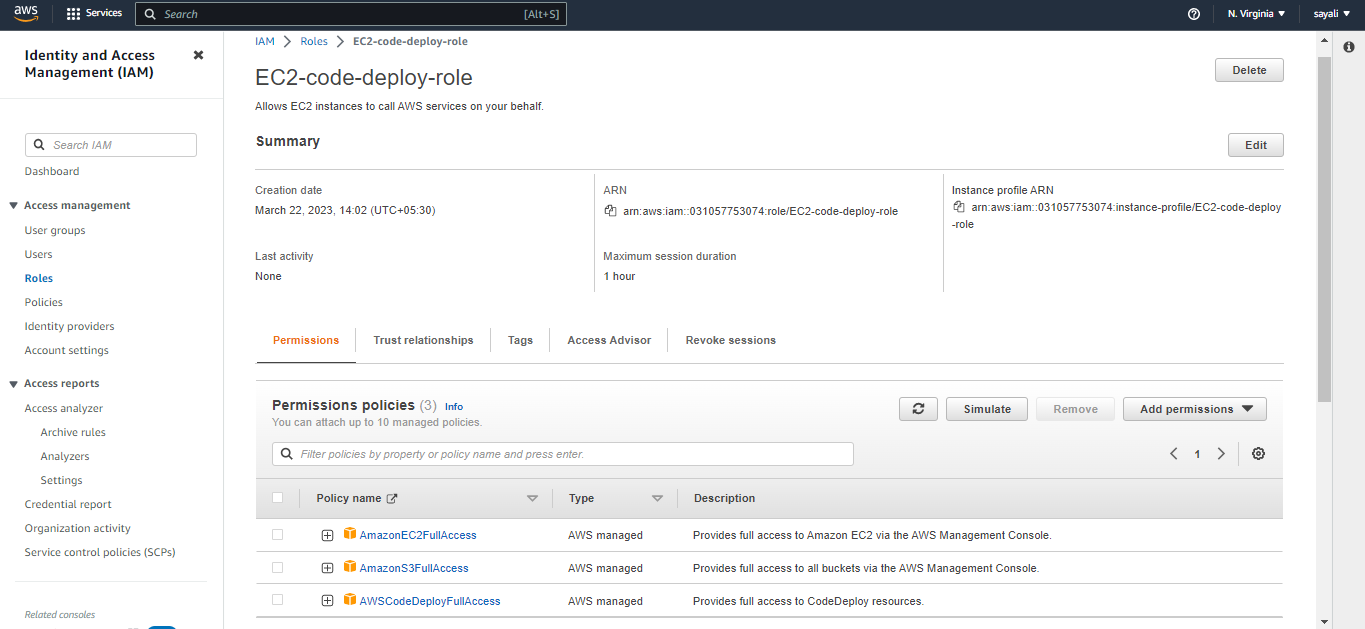
Attach that service role to EC2 instance.
Select EC2 instance, In actions, go to security and click on 'Modify IAM role'.

Select service role that we created in above steps.

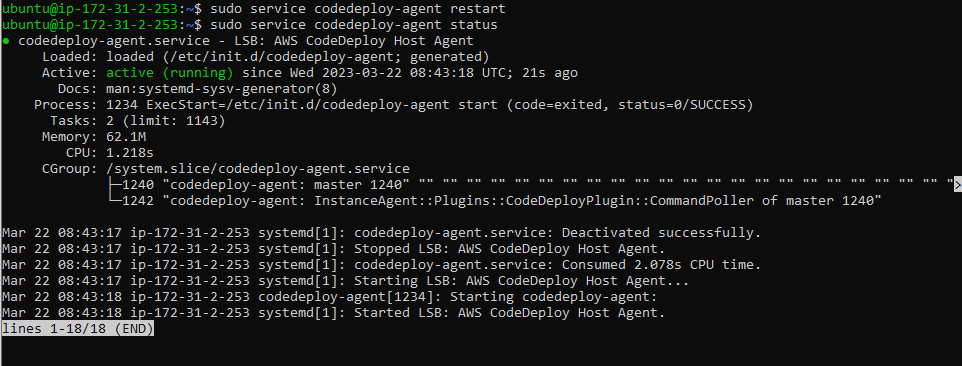
After updating IAM role, restart code-deploy agent.
Deployment status is Succeeded.
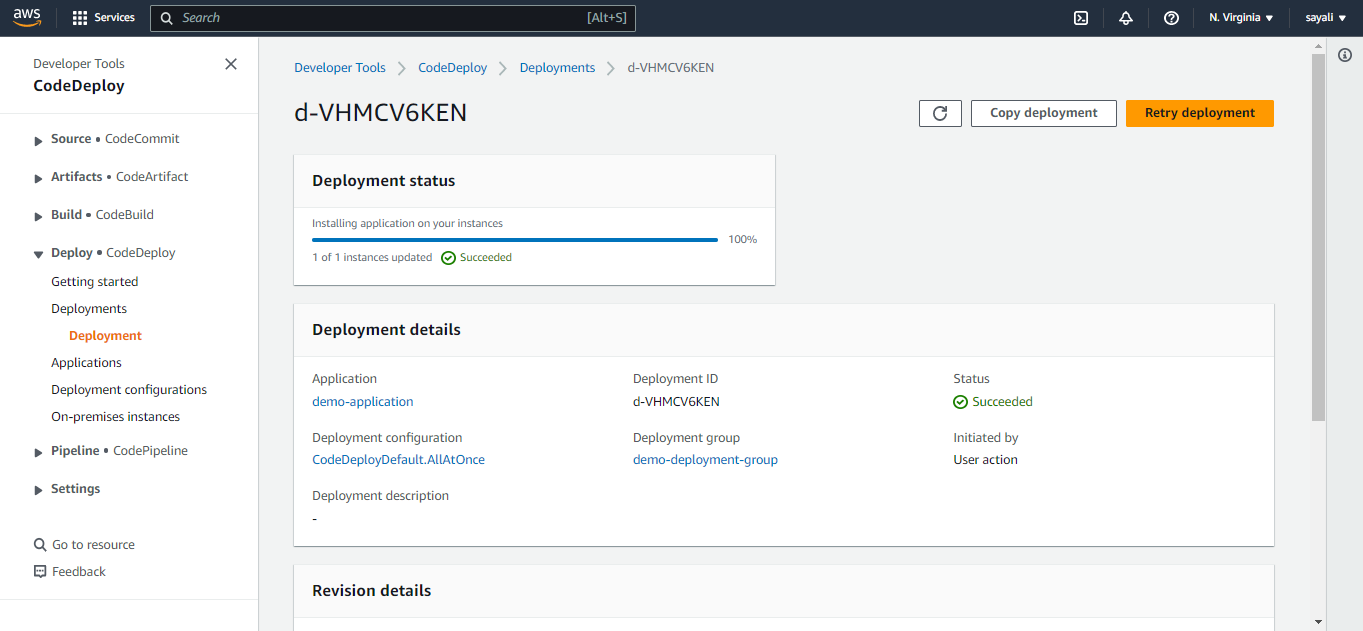
All events Succeeded.

Browse instance public IP address, it will show output of index.html file.

Thank you for reading!! I hope you find this article helpful!!
Happy Learning!!
Sayali✨


